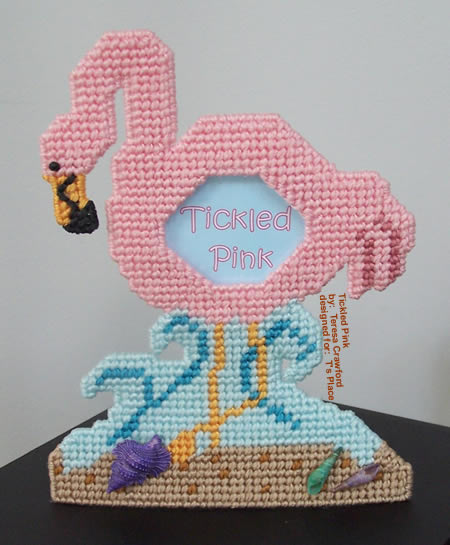
Tickled Pink


 Materials:
7 count Plastic Canvas Mesh (2 pieces)
Needloft Yarn:
#07 Pink - 11 yds.
#05 Lavender - 1 yd.
#36 Baby Blue - 6 yds.
#54 Turquoise - 1 yd.
#11 Tangerine - 1 yd.
#16 Sandtone - 6 yds.
#13 Maple - 1 yd.
#00 Black - 1 yd.
To Finish Project:
Small Dyed Shells
Aleene's Craft Glue
Any Picture or saying of your choice
 Stitches Used:
 Instructions:
Cut 2 pieces of mesh 46X59 threads (45X58 holes) for flamingo and 1 piece 9X25 threads (8X24 holes) for the stand. Following the pattern, cut out the center for the insert only on the front piece of project. Set aside the second piece (back) as it's not stitched (you don't cut out the center either) and set aside the stand. Stitch the project according the pattern. Don't forget to french knot the eye.
Overcast the center in pink. Add your insert when you are done stitching the project. You can use a little clear picture tape if you want to hold it in place (if you want your insert to have that glossy look and be protected - laminate it first). Whipstitch the front stitched piece to the back unstitched piece using adjoining colors, using the finished picture as a guide (only the tip of the flamingo's nose is whipstitched in black, the rest of the nose is whipstitched in tangerine).
DO NOT whipstitch along the bottom edge to the back piece this is only done in overcast and not attached to the back piece. There is not a pattern for the back stand piece, you can overcast it in sandtone if you wish. Attach it to the back of the project with sandtone yarn, making sure to center the piece (which should be about 23 holes over and flush to the bottom of the project, see picture of back on pattern page). Glue the shells to the front of the project in the sand area where you wish.
Flamingo Poem:
Flamingo
Tickle me pink
Laugh and cry
Stick your neck out
Don't ask why
Travel along beaches
Stand around all day
Have lots of joy
Know all is okay
 The Pattern:

Questions or comments? Contact teresa@tsplace.com
Copyright 1997-2017 Teresa Crawford. Not for commercial use without permission
Back to T's Place!